Facebook Advertising, BLOG, Marketing & SEO
How to Create Facebook Ads With Mailchimp in 2026
Nov
I used to think Facebook advertising was only for people with big budgets and plenty of marketing experience. With a small email list and limited money to spend, I wasn’t sure where to begin. The whole process seemed more complicated than it needed to be.
That changed when I learned how to create Facebook ads with Mailchimp. The process was much easier than I expected. In this guide, I’ll walk you through how to create Facebook ads with Mailchimp in five simple steps, using clear and practical instructions. You’ll learn how Mailchimp helps organize your contacts, how Meta manages your ads, and what to set up before launching your first campaign. By the end, you’ll know exactly where to start and what to check along the way.
How Does It Work When You Create Facebook Ads With Mailchimp?
The tools share the work. Mailchimp stores and sorts your contacts. Meta shows the ads to them. Before you learn how to create Facebook ads with Mailchimp, understand this split. It makes every step clearer.
What Mailchimp Does and What Meta Does
Mailchimp is an email marketing platform. Meta is the owner of Facebook and Instagram. Each tool has its own parts.
Mailchimp handles:
- Your customer list and segments
- Audience syncing
- Automation flows
Meta handles:
- Your ad account and Meta Pixel
- Ad delivery on Facebook and Instagram
- Ad reports
You pay Meta for paid ads. Posts you do not pay for are organic posts. They are antonyms in marketing.
What You Need Before You Start
Set up these items first, and learning how to create Facebook ads with Mailchimp gets easier:
- An active Meta Business Manager account
- A Meta ad account
- A customer list Custom Audience
You will also choose a Facebook Page, an Instagram profile, and a Meta Pixel during the connection. Meta checks the age of your Business Manager account when it decides who can create a customer list Custom Audience. So set it up early. Use only contacts who agreed to receive marketing.
Which Mailchimp Plan Fits Facebook Ads?
All Mailchimp Marketing plans, such as Essentials and Standard, can install the Meta Business Extension. Some Meta and Instagram features depend on your plan. The Meta Custom Audience action in automation flows needs the Standard plan or higher. Prices change often, so check Mailchimp’s pricing page before you choose.
How to Create Facebook Ads With Mailchimp Step by Step
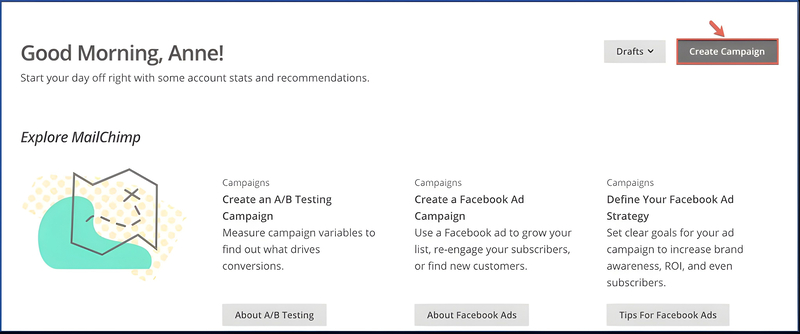
Here is how to create Facebook ads with Mailchimp, in five short steps. Take them one at a time. Each step builds on the one before it.
Steps 1–2: Connect Meta and Sync Your Audience
Step 1: Connect the Meta Business Extension. Open the Meta Business Extension app page in Mailchimp and click Connect. Log in to Facebook and review the permission requests. Then select your Business Manager account, Facebook Page, Instagram profile, ad account, and Meta Pixel. These five are meronyms of your Meta business setup. Only one Mailchimp account can connect to one Meta business account.
Step 2: Sync your audience. On the confirmation screen, decide about automatic advanced matching. It matches your customer details with people on Facebook. Before you turn it on, clean your contact list. Remove old and fake email addresses. Clean data gives Meta better information to match. That is the second part of how to create Facebook ads with Mailchimp.
Step 3: Build a Custom Audience From Your Contacts
A Custom Audience is a group of people that Meta matches from your own data. Start with a Mailchimp segment. With a connected store, Mailchimp offers ready-made groups. They are hyponyms of segments: First-time Customers, Repeat Customers, Lapsed Customers, High-value Customers, Recent Customers, and Potential Customers.
Pick one group and one goal. For example, choose lapsed customers if you want repeat orders. You can also use the Meta Custom Audience action inside an automation flow. It needs the Standard plan or higher. This step is the heart of how to create Facebook ads with Mailchimp, because your audience decides who sees the ad.
Steps 4–5: Launch Your Ad and Check the First Results
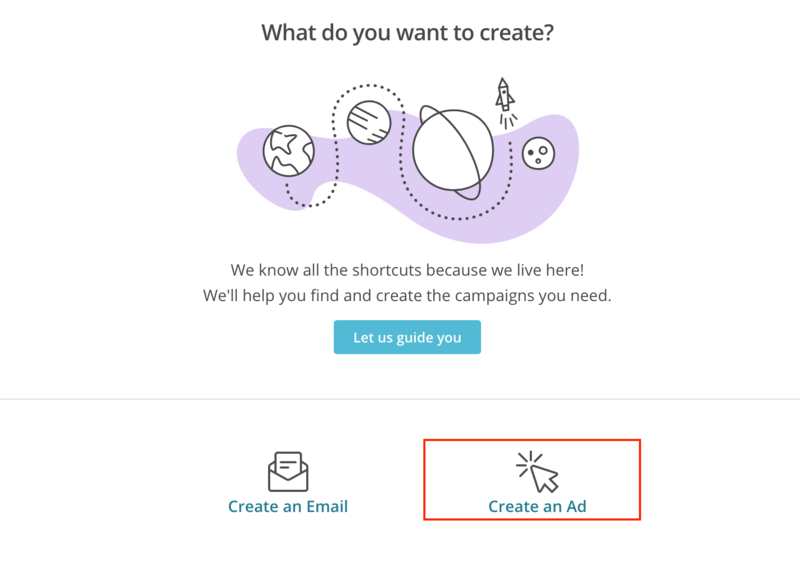
Step 4: Launch your ad. At the end of the connection, click Create Ad to build a new Meta ad. Or click Done and build the ad later in Meta’s ad tools. Then follow this checklist:
- Choose your synced custom audience as the target.
- Set a small daily budget.
- Use one image, one short message, and one button.
- Ask for one action only, such as “Shop the new collection.”
Meta reviews each ad before it goes live.
Step 5: Check the first results. Open Meta’s ad reports. Watch four numbers:
- Reach
- Click-through rate
- Cost per click
- Conversion rate
These four are hyponyms of ad metrics. Give each ad a few days before you judge it. For your email sales, open Analytics, then Reports, then View Report, then the E-commerce tab. You now know how to create Facebook ads with Mailchimp, from first click to first report.
How Can You Make Your Facebook Ads Work Better?
A first ad is only the start. Better results come from clear goals, small tests, and fresh audiences. Learning how to create Facebook ads with Mailchimp is step one. Learning to improve them is step two. Change one thing at a time, such as the image or the message. Then compare each version against your goal. Refresh your segments every month, so your ads reach current customers.
Four Ad Ideas for Beginners
Pick one idea for your first campaign. Each one uses a segment you already have:
- Win-back ad: a “we miss you” message for lapsed customers
- Abandoned cart ad: a reminder about items left behind
- VIP ad: early access for high-value customers
- New product ad: a launch message for repeat customers
These four are hyponyms of Facebook ad ideas. Start with one, test it, and then add another. That is the practical side of how to create Facebook ads with Mailchimp.
Common Mistakes and How to Avoid Them
These mistakes cost me the most. I hope you can skip them:
- No Meta Pixel. Without it, I could not see which ads led to sales. Install it during setup.
- A messy contact list. Old and fake addresses lower your match rate. Clean the list first.
- Judging by clicks alone. A win-back ad should bring back customers. Count repeat orders too.
- Changing many things at once. You cannot tell what worked. Change one thing at a time.
- Too many goals. One ad should ask for one action.
One clear goal and one fair test beat a big budget. Remember this whenever you plan how to create Facebook ads with Mailchimp.
Conclusion
Now you know how to create Facebook ads with Mailchimp for your small business. Connect Meta, sync a clean audience, build a Custom Audience, launch one ad, and check the results.
If you still wonder how to create Facebook ads with Mailchimp, start with one segment and one ad. Take small steps, test what works, and learn as you go. Small, steady tests often teach you more than big plans. You have got this!
FAQ
1.How Do I Create Facebook Ads With Mailchimp as a Beginner?
Start with the Meta Business Extension. Connect it, sync your audience, pick one segment, and click Create Ad. That is how to create Facebook ads with Mailchimp as a beginner. Meta then delivers the ad.
2.Do I Need a Paid Mailchimp Plan to Create Facebook Ads?
All Mailchimp Marketing plans can install the Meta Business Extension. Some Meta and Instagram features depend on your plan. The Meta Custom Audience action needs the Standard plan or higher. Check Mailchimp’s pricing page for current plans.
3.What Is a Custom Audience in Facebook Ads?
A Custom Audience is a group of people that Meta matches from your own data, such as a customer list. You use it to show ads to people who already know your business.
4.How Do I Disconnect Mailchimp From Meta?
Open the Meta Business Extension app page in Mailchimp and click Disconnect. Then open Meta Business Manager, go to Business settings, Integrations, and Connected apps. Click Remove app next to Mailchimp and confirm.
